- CRAFT -
To better grasp modernly built guitars, we must first think about what leads one to continuous experimentation in the building of such guitars. The reason is mainly that the guitar is a very quiet instrument with weak tone and short sustain. Therefore, the builder is trying to amplify their instruments. The volume of the instrument is also one of the reasons for the use of composite materials in the construction of such guitars. Currently, there are basically two ways to build a guitar using composite materials, known as either Double top or Lattice guitars. Double Top construction involves sticking an aramid honeycomb core between two thin soundboards. The guitar then uses the standard ribbing of conventional classical guitars. The point is in the very light and thin resonance board, which has a very fast response. On the other hand, the Lattice guitar is constructed with only one very thin sound board, which is a laminated balsa grid sandwiched between carbon rows. It is necessary to reinforce the internal frame using laminated side and back to hold the guitar together.
- Lattice guitar -
Of course, there are more ways of building this type of classical guitar, but I'll describe only the paths that I have chosen myself.
- Neck and Headstock -
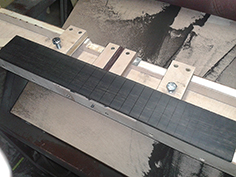
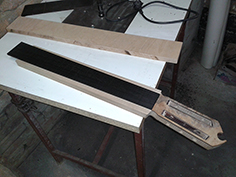
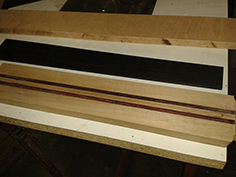
I always start with the neck, because the precise alignment of the slots in the frame must be done accordingly. The neck is glued with multi colored parts which looks good and allows for better dimensional stability. I use a combination of five pieces of wood, three thin in the middle and two thicker at the edges. Thus glued it is then machined such that all edges are of a right angle. The left side is measured and then cut at a 12 ° angle so that, upon tipping, the stripped portion is of the correct length for the head. From the other end are truncated four parts which are later glued to the heel of the neck. After gluing the headstock I drill slots for a two-way truss rod. This reinforcement is usually applied to a steel stringed guitar due to the larger tension of the strings. For better adjustability I apply the bending neck brace to nylon string guitars, because practice shows that long-term weather conditions and the tension of the strings affect the geometry of the neck on the classical guitar as well. Applying the two-way Truss Rod requires a little trick. I make the Groove for the Truss Rod about 1.5 mm deeper than the height of the actual Truss Rod. Then I make a shim that you stick with epoxy on the top surface of the Truss Rod. The trick is that it can hold any number of clamps and the shim adheres perfectly to the Truss Rod. The the surface is planed to the level of the neck and the fingerboard is perfectly glued. This little trick eliminates the buzzing sound of the guitar which a poorly glued truss rod can cause. Then the head plates are glued and the head is formed, including drilling holes for the tuning machines.
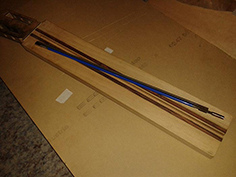
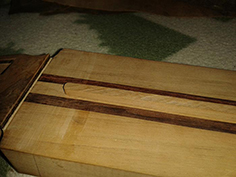
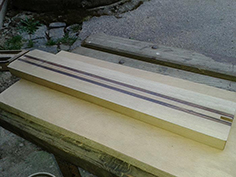
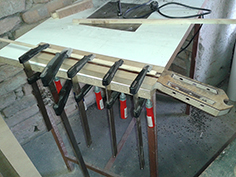
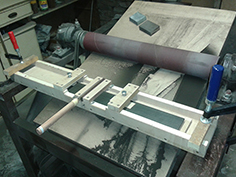
All that remains is to glue the shaped fretboard with grooves for the frets. Thus the glued fretboard can be used as a template for milling the shape of the neck and as such the shaped neck assembly routing template serves to mill slots into the frame for a pivoting neck. For more information, see the next chapter.
- Frame -
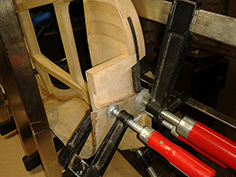
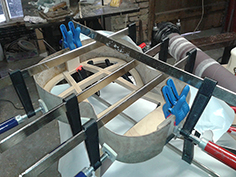
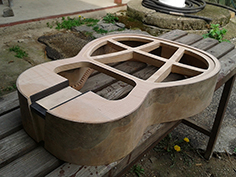
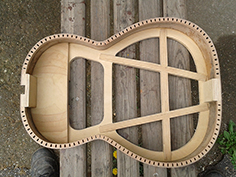
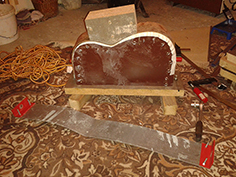
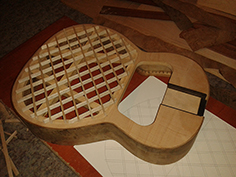
As earlier mentioned, the guitar frame is an important design element. In my case it`s a conglomerate of 18 mm beech plywood glued from 7 parts. The full frame is shown in the photos below.
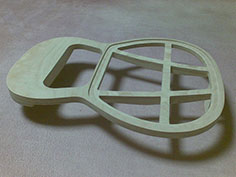
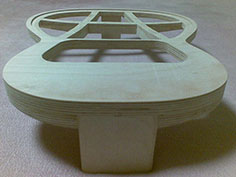
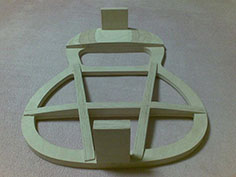
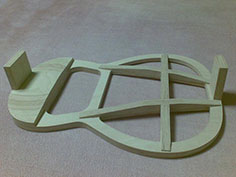
Then three slots are milled into the frame slots serving as the establishment of the neck, including the heel. Subsequently, the hinge of the neck is glued into one of the slots. This creates a hinge pivot point, which makes it possible to change the neck geometry (rotation) and optimize the action above the fingerboard. The setting is done via allen screws inside the guitar.
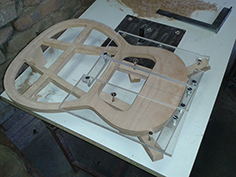
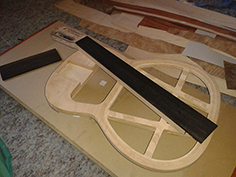
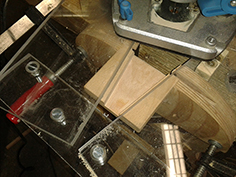
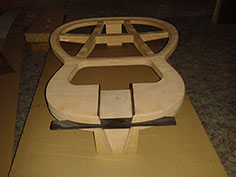
After gluing the laminated sides and binding the guitar body is almost finished. Yet it is also necessary to glue the soundboard, which stiffens around the sound hole and glued laminated back.
- Back and Sides -
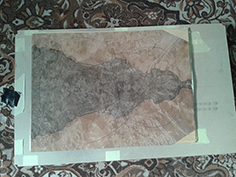
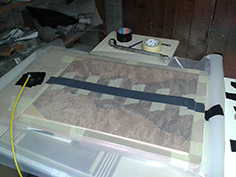
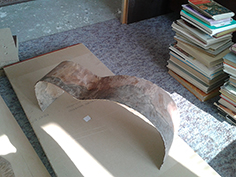
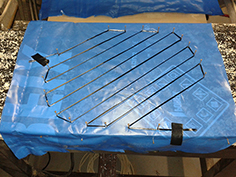
The back and sides are made via known Lamination methods. By this I mean that the veneers are glued together with epoxy. The sides are made up of five pieces of 0.6 mm thin veneers, the four outer layers of the fibers longitudinally and then one layer transversely. Their final thickness is then 3 mm while the back is laminated with 11 crossed layers. The final thickness is then 6.6 mm. The back does not need further reinforcement as with the conventional classical guitar. The back, as seen from the photos, is laminated with vacuum technology into the mold. The sides and back are very strong, and as I already mentioned, helps to hold the subtle soundboard frame together.
- The Top -
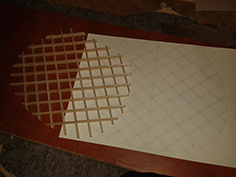
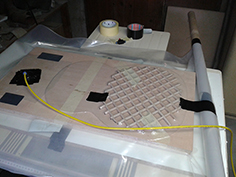
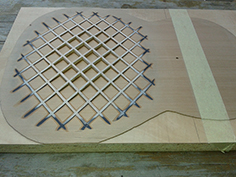
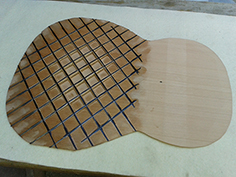
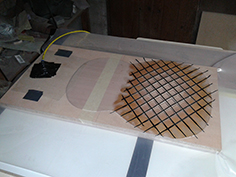
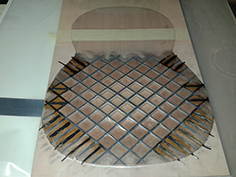
The top is one of the major assemblies in the building of guitars. In this case I use only the highest quality cedarwood (preferred for this type), although spruce can be used, of course, as well. The board is a traditionally jointed butt of two sister halves. After the glue has dried it`s thicknessed is made up to 1.2 mm. This is only a rough estimate, because in fact we will have even less, about 1 mm and 0.7 mm from the edges. Much depends on the quality of the material used. Now is the time to make the balsa grid. The slats, which act as formats for the grid, are about 10 mm high and 3-4 mm wide after gluing at an angle of 55 °. Furthermore, the procedure gets a little bit complicated: We need to create a mold for the vacuum bonding and the grid on the lower side to adapt to the same shape. Now I glue carbon rowing between the grid and top. I do it in a vacuum press. I use a carbon rowing 12K on the bottom side of the grid and 2x6K on top. Everything is glued with epoxy. I use epoxy and rowing certified for the aerospace industry.
- Leveling of the Frets -
Leveling of the frets is another important operation in the manufacturing of guitars, which is much overlooked in the construction of factory guitars. The frets themselves, perfectly crimped into the fingerboard, are never perfectly aligned horizontally, so they must be sanded and then a rounded crown created, which must be perfectly polished to remove filler scratches. Only then it is possible to set a comfortable action and avoid unwanted string noise on the frets.
- Nut and Saddle Compensation -
It is a known fact that the calculation of frets on the fingerboard is only a theoretical value, which must be compensated for in practice. Each string has a diameter and tension, which affects the tuning of the strings. When tones are played on the frets it obviously works differently than on an open string. Therefore, it is necessary to compensate not only the saddle at the bridge, but it is also necessary to compensate at the nut of the guitar. You can read more at the link below.
- Finish -
Finally, I chose a lacquer for my instrument called Hard Top Polish. It's a no wax shellac with modified synthetic resins which give the lacquer a higher moisture resistance than found in normal shellac polishes. Methods of applying the lacquer are identical to the application of conventional shellac polishes, and the same applies for soluble alcohol.
* * *
- Website creation and design - Petr Čehovský 2015 -